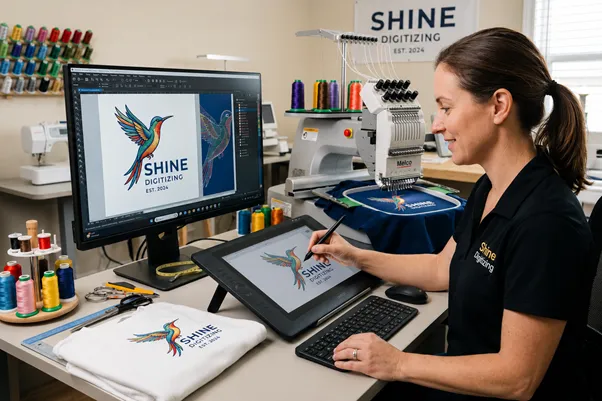
An embroidery machine cannot read a JPG, a PNG, or a logo you pulled off a website. It reads a stitch file: a long set of coordinates and commands that tell the needle exactly where to go, how long each stitch should be, where to change thread color, and where to cut. Embroidery digitizing is the work of turning a piece of flat artwork into that stitch file.
A person called a digitizer does this work. They take your design and decide how it should be broken down into thousands of individual stitches so a machine can sew it cleanly onto real fabric. That last part matters more than most people expect, because thread on a stretchy polo shirt behaves nothing like ink on a screen.
If you have ever searched for how to digitize embroidery designs and walked away more confused than when you started, this guide is for you. We will cover what digitizing really is, how the process works, where it came from, the file formats involved, and what it actually takes to learn it yourself.
Digitizing is not the same as converting an image
Here is the misconception worth clearing up first. Plenty of software claims it can turn any image into an embroidery file with one click. It can. The results are usually bad.
Automatic conversion tools trace the edges and colors of an image and guess at stitches. They have no idea that your fabric is a knit that stretches, that your lettering is only 4 mm tall and will turn into a blob at that size, or that the design needs a foundation of stitches underneath to keep it from sinking into a towel. A good digitizer makes hundreds of these judgment calls. A tracing algorithm makes none of them.
So when people say embroidery digitizing, they are really talking about translation, not conversion. Someone who understands thread, tension, and fabric is rebuilding your artwork as a sequence of stitches that will hold up after the machine runs and after the garment goes through the wash a few dozen times.
How does embroidery digitization work?
The exact workflow varies by digitizer and software, but the core process looks like this.
- Review the job. The digitizer looks at the artwork, the final size, where it goes on the garment, the fabric type, the thread brand, and how many colors are involved. A 2 inch left chest logo and a 12 inch jacket back are completely different problems.
- Prepare the artwork. Messy or low resolution files get cleaned up or redrawn. Tiny text and fine gradients often get simplified, because thread has limits that pixels do not.
- Plan the stitch sequence and path. This is the part beginners skip and pros obsess over. The order in which areas get stitched affects registration, trims, and how often the machine stops. Good pathing means fewer thread cuts and a cleaner result.
- Assign stitch types. Three do most of the work. Running stitch (also called a walk stitch) handles thin lines, outlines, and fine detail. Satin stitch creates smooth, glossy columns and is the standard for borders and lettering up to roughly 10 to 12 mm wide. Fill stitch, also known as tatami, covers large areas with rows of stitches and can carry texture and direction.
- Add underlay. Before the visible stitches go down, the digitizer lays a layer of light foundation stitches. Underlay anchors the fabric to the stabilizer, stops the design from shifting, and gives the top stitches something to sit on. Skip it and your design puckers or sinks.
- Set density and pull compensation. Density is how tightly the stitches pack together. Pull compensation accounts for the way thread pulls fabric inward as it sews, which distorts a design if you ignore it. A circle digitized without compensation comes out as an egg. Experienced digitizers widen columns slightly on the axis where the pull will happen so the finished shape looks correct.
- Set the finishing details. Entry and exit points, automatic trims, and color stops all get placed so the machine runs smoothly and the operator knows when to swap thread.
- Export to the right machine format. More on formats below.
- Sew a sample. This is the real test. A careful digitizer runs the file on fabric similar to the final product, inspects the stitch out, then goes back and fixes registration gaps, density problems, or distortion. Anyone who hands over a file without a test sew is guessing.
That cycle of stitch, inspect, and adjust is where experience shows. The software is a tool. The decisions are human.
A short history of embroidery digitizing
People have embroidered cloth by hand for thousands of years. Machine embroidery is much younger, and the digital version is younger still.
Before computers, designs were created through a process called punching. An operator manually plotted a design and produced a punched paper tape that fed the machine, telling it where to stitch. Large Schiffli looms, some spanning many feet, produced lace and big patterns this way. The work was slow and skilled, and the term "punching" still hangs around the industry today even though no one punches tape anymore.
The shift to computers happened in the early 1980s. In 1979, Bill Wilson and Robert Pongrass founded Wilcom in Sydney, Australia. Wilcom went on to build the first computer graphics design system for embroidery that ran on a minicomputer, and debuted the concept at the 1981 Bobbin Show in Atlanta. Around the same time, Melco, formed by Randal Melton and Bill Childs, created the first embroidery sample head for Schiffli looms and in 1980 introduced a digitizing system called the Digitrac at the Show of the Americas. The Digitrac was a small computer mounted on an X and Y axis over a large board. Operators digitized the design at six times its final size, output it to paper tape and later to floppy disk, and the system sold for about 30,000 dollars.
In 1982, Pulse Microsystems released Stitchworks, software that let users convert outlines into stitches on a personal computer. Through the 1980s, machine makers including Tajima and Barudan rolled out computerized multihead machines, and by the 1990s computerized embroidery had spread into both commercial shops and home sewing rooms.
The decades since brought floppy disks, then USB drives, then wireless transfer of designs straight to the machine, and now cloud libraries and software that attempts automatic digitizing. The hardware keeps getting faster. The fundamental craft of deciding how a design becomes thread has not changed nearly as much.
Embroidery file formats you should know
Each machine brand grew up with its own format, which is why the file naming looks like alphabet soup. A few matter most.
DST is the Tajima format and the closest thing to a universal commercial standard. It is reliable and small, but it stores only stitch data, not color information, so colors get assigned manually.
PES is the native format for Brother and Babylock machines and is the most common home format in the US. It stores color data, which makes setup easier on home machines.
JEF is Janome and Elna's native format. EXP is used by Melco and Bernina and, like DST, carries no color data. VP3 belongs to Husqvarna Viking and Pfaff and holds richer data including colors and notes.
There is also a separate category worth knowing about. EMB (Wilcom) and ART are master working files. Unlike DST or PES, they keep every editable detail: stitch density, underlay, color sequence, trims, and the original objects. Think of a DST file like a finished PDF you can run but not really edit, and an EMB file like the layered source design you can reopen and change. A good digitizing service keeps the editable master so adjustments later are cheap and fast rather than a full redo.
How to digitize embroidery designs and how to learn it
If you want to learn how to digitize for embroidery yourself, here is the honest version. It is learnable, and it takes real practice. Your first several attempts will probably pucker, distort, or look thin. That is normal.
You will need digitizing software. The professional options include Wilcom and Hatch (which is powered by Wilcom), Brother's PE Design, and Embird. There is also a free, open source option called Ink/Stitch that runs on top of Inkscape, which is a reasonable place to experiment without spending money.
A workable learning path looks like this. Start with a simple, single color shape, not a detailed logo. Learn the three core stitch types and when each applies. Learn to add underlay and to set density before you worry about anything fancy. Stitch out everything you make on real fabric, because the screen lies and the needle tells the truth. Keep notes on what puckered and why. Study how pull compensation changes your shapes. Then slowly work up to lettering, which is harder than it looks, and multicolor designs with proper sequencing.
Expect a learning curve measured in months, not days, if you want results good enough to sell. Many people learn enough to digitize their own simple projects and happily hand off complex logos to a professional. Both are valid.
When to digitize yourself and when to hire a service
Doing it yourself makes sense when you want to learn, when you have time to iterate, or when your designs are simple and personal. Hiring a digitizer makes sense when the design is a client logo with small text, when you need it right the first time, when the fabric is tricky, or when your time is worth more than the file.
This is the trade we work in at Shine Digitizing. We digitize logos, lettering, and complex artwork by hand and test the files so they sew clean on the fabric you actually use. If you would rather spend your hours running your shop than chasing pucker on a 5 mm typeface, that is the case for outsourcing it.
Conclusion
Embroidery digitizing is the craft of turning artwork into a stitch file an embroidery machine can sew, and the quality of that file decides whether your design looks crisp or like a tangled mess. The software has improved enormously since Wilcom and Melco built the first systems in the early 1980s, but the part that matters, the human judgment about stitch type, underlay, density, and how thread pulls fabric, is still learned the slow way: by stitching things out and fixing what went wrong.
Frequently Asked Questions
A simple left chest logo might take a skilled digitizer under an hour. A detailed, multicolor jacket back with small lettering can take several hours plus test sews.
Not directly, and not well. Photographs have gradients and detail that thread cannot reproduce. A photo usually has to be simplified or redrawn into clean shapes first.
Usually it comes down to missing or weak underlay, density set too high, the wrong stabilizer for the fabric, or no pull compensation. Puckering is a digitizing and stabilization problem far more often than a machine problem.
For a basic shape on stable fabric, sometimes. For logos, small text, and anything you are charging for, hand digitizing still wins by a wide margin.
It depends on your machine. Home Brother and Babylock users usually want PES, Janome users want JEF, and most commercial shops run DST. When in doubt, check your machine manual.